Image courtesy of Scryfall.com
Collective Effort in Eldritch Moon Limited: When to Prioritize Drafts
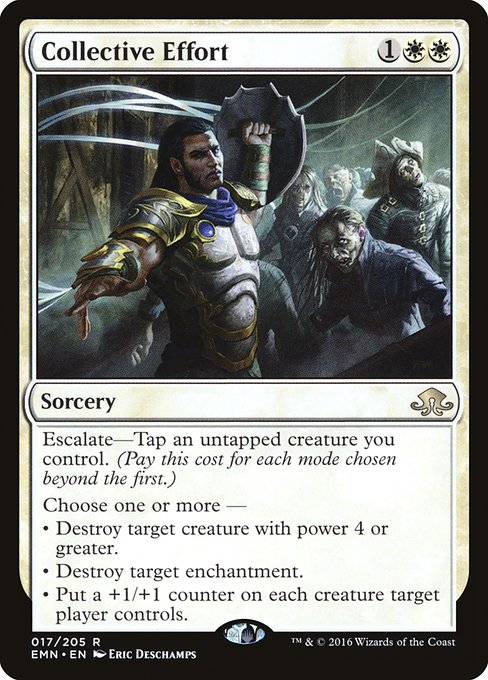
As a draft card, Collective Effort sits at that intriguing crossroads between early removal and late-game inevitability. It’s a rare white sorcery from Eldritch Moon with the elegant, if occasionally merciless, Escalate mechanic. For the uninitiated, Escalate lets you pay an additional cost for each mode chosen beyond the first—specifically, tapping an untapped creature you control. That means Collective Effort costs you a tap or two if you want to go beyond the initial mode, but the payoff can swing a game in your favor in a hurry 🧙♂️🔥.
In a game of Limited, where every card fight can hinge on a single combat step or a well-timed removal spell, Collective Effort rewards you for building a board that can spare a few extra bodies. The spell itself costs {1}{W}{W} and provides three modes to choose from (one or more total): destroy a big creature, destroy an enchantment, or place a +1/+1 counter on each creature that a target player controls. The flexibility is delicious, especially in an environment filled with anthem effects, equipment auras, and emboldened beaters. The card is white, rare, and part of Eldritch Moon’s plentiful pile of structured removal and buff options—perfect for players who like to plan several turns ahead while reacting to threats as they appear 🎲⚔️.
Understanding the three modes and when they shine
- Destroy target creature with power 4 or greater. This is your classic hard removal option, but the target is restricted by power. It shines against a bruiser or a bomb in the midgame. If you’re curating a white deck that wants to tempo away big threats, this mode is the backbone of your counter-punch. If your opponent’s deck thrives on a single, oversized attacker, Collective Effort can erase that threat while you keep your life total intact. 🔥
- Destroy target enchantment. Enchantments and equipment can snowball quickly in Limited, especially in a meta full of auras and utility permanents. This mode buys you time and detaches threats before they become untouchable. It’s particularly potent when you’re facing auras that pump or protect key creatures—this mode can shut down a recurring problem without needing to overcommit to a fight. 🎨
- Put a +1/+1 counter on each creature target player controls. This last option is the trickier one. If you choose it on your own turn or against an opponent with a wide board, you can push into dominance by making your own army bigger, or you can accidentally empower their board if you’re not careful. The Escalate cost is the gatekeeper here: you’ll want enough untapped creatures to pay for the extra mode and avoid tipping the balance in your opponent’s favor. Still, when you can load up multiple modes, this is the kind of broad effect that turns a removal spell into a swing spell 💎.
In practice, Collective Effort is most valuable when you have a robust creature base and a handful of interaction spells. If you’re light on bodies or you’re facing a board with minimal targets for removal, the card still holds value as a flexible answer that can tilt a late-game race in your favor. The rising power of escape and pump in Eldritch Moon’s general environment makes it a genuinely frightening tool in white’s arsenal—one that asks you to weigh tempo against value and plan for the inevitable board stalls 🧙♂️.
Draft priorities: when to reach for Collective Effort
In a typical sealed or limited pool, you’ll want Collective Effort when you’re already weaving a solid white tempo or midrange shell with plenty of tapped-out bodies and a few on-board threats. In draft, early on you should evaluate:
- Do you have enough untapped creatures to pay the escalate cost multiple times? The first mode is free to cast as long as you’re paying {1}{W}{W}, but additional modes demand you to tap extra creatures. If you’re light on creatures, you may be better off taking a safer removal spell or a proactive threat and leaving Collective Effort for a later pick or a defensive-sideboard situation in a two-color deck. 🧭
- Are there enough enchantments on the battlefield to justify the enchantment-destroying mode? If your opponent’s deck heavily leans on Auras and enchantments, that second mode becomes more valuable than you might expect. A well-timed Collective Effort can swing the matchup from “we’re trading” to “we’re sweeping.”
- Do you have a cohort of creatures that benefits from a post-battle bump? The third mode is excellent when you’re trying to push through lethal damage or break a stalemate, provided you control the board enough to avoid giving your opponent a win condition with a single well-placed buff.
As a general rule, if you’re drafting white and you’re seeing a few removal spells or a few enchantments in your pack, Collective Effort can be a late-game pivot that turns a handful of bodies into a board-wide removal-and-pump engine. It isn’t a one-card plan-ender, but it’s the kind of card that rewards patient drafting and careful resource management. And when you deploy it with a couple of other payoffs (auras you’re not running, or anthem effects that don’t rely on you overcommitting), you’ll feel the classic thrill of a well-executed white-lilting plan that wins through attrition and tempo alike 🧙♂️💥.
Deckbuilding thoughts: maximizing value in Limited
To truly unlock Collective Effort, you want a deck built around resilience and board presence. Curve considerations matter—having a stable early drop, a handful of midrange plays, and a few reactive picks helps you get the most value from the escalate cost. You’ll want a decent number of untapped creatures as a prerequisite to paying for extra modes. If you’re in a two-color white build, ensure you’ve got enough stable mana sources to reliably cast at least one mode while your board develops. If you go broader into white, consider pairing with other color splashes that provide additional removal, protection, or late-game finishers to close out games once you’ve cleared threats. ⚔️
One practical tip: choose Collective Effort when you’re confident you can protect your top-end with enough bodies to pay escalation without overextending. The value rises when you can Samus-like combo your amass of tokens or early threats with a mid-to-late game board swing. In short, it’s a card that punishes indecision and rewards players who keep their foot on the gas while staying mindful of their untapped resources 🧙♂️.
As you map your approach to limited formats, keep in mind the practical realities of Eldritch Moon’s mix: a healthy dose of removal, a dash of big creatures, and a steady stream of enchantments. Collective Effort fits neatly in decks that want to control the pace while building a resilient board. It’s not always your first pick, but in the right moment, it’s the kind of multi-tool that separates solid draft players from the legendary few who squeeze every ounce of value out of a single card 🔥💎.
Neoprene Mouse Pad Round Rectangular Non-SlipMore from our network
- https://crypto-acolytes.xyz/blog/post/top-youtubers-covering-survival-games-you-must-watch/
- https://blog.digital-vault.xyz/blog/post/2025-neon-gradient-digital-papers-design-trends-unveiled/
- https://crypto-acolytes.xyz/blog/post/best-minecraft-mods-of-2025-top-picks/
- https://crypto-acolytes.xyz/blog/post/navigating-crypto-challenges-in-international-law/
- https://blog.digital-vault.xyz/blog/post/tracking-a-hot-blue-giant-across-two-kiloparsecs/